
Trafficity Beginner Guide: First City, First Junction
A first-city plan for Trafficity: pick the right map, lay a spine road, place your first roundabout and avoid the three mistakes that jam a new save.
Trafficity hands you a blank map, a road tool with no grid, and a simple promise: keep the cars moving. The first twenty minutes decide whether your save grows into a working city or a permanent traffic demo. Three things matter early - the map you pick, the shape of your spine road, and whether your first junction is a roundabout or a bare crossing. Get those right and the rest of the game is a series of small, fixable traffic problems instead of one large unfixable one.
If you have not bought the game yet, the Trafficity review→ covers what the simulation actually feels like. This page assumes you already own it.
Pick the right first map
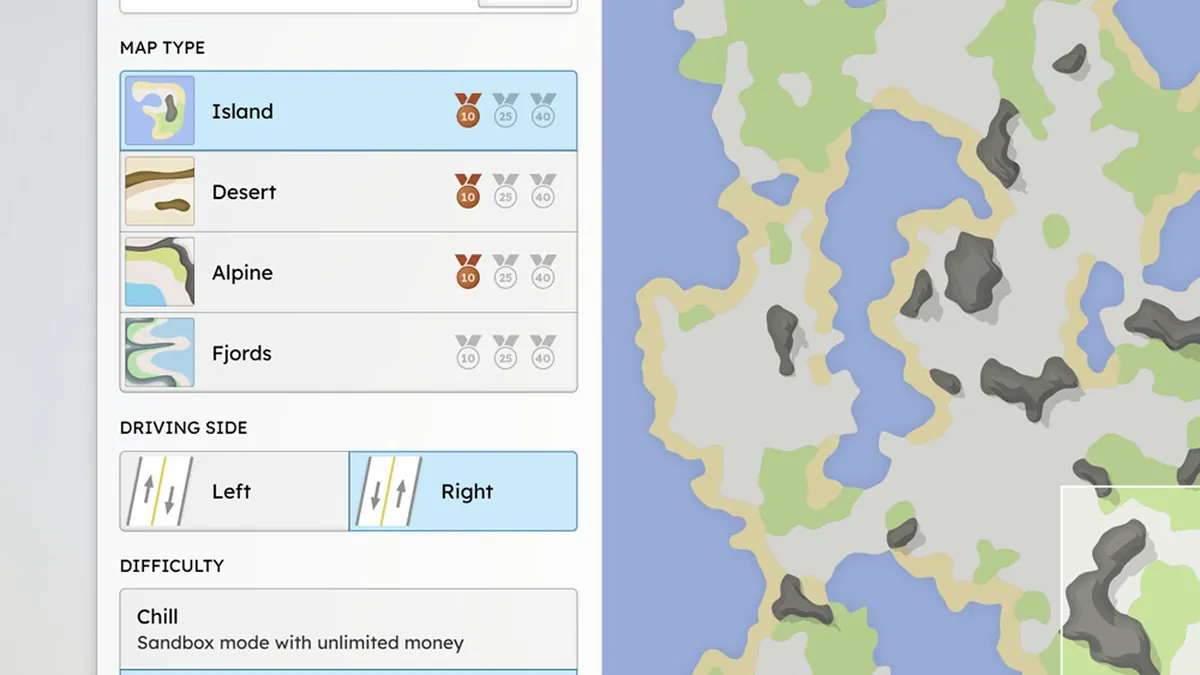
Trafficity ships with four biomes - Island, Desert, Alpine and Fjords - and three difficulties. Island is the friendliest starting point: water gives you natural edges, so you spend less time fighting sprawl and more time learning junctions. Desert is wide open, which sounds easier but punishes bad road hierarchy because there is nothing to stop a grid from expanding in every direction. Alpine and Fjords add terrain that forces interesting geometry, which is great for a second save and frustrating for a first one.
Difficulty is separate from biome. Chill is a sandbox with unrestricted money, Normal is the intended experience, and Expert tightens money and requirements. For a first city, Normal is the honest choice: you feel the cost of a badly placed road, but you are not punished for experimenting.
The map generator accepts a seed, and the New Game panel shows it. Note the seed of a map you like - regenerating a good river layout later is otherwise luck.
Build a spine before you build a grid
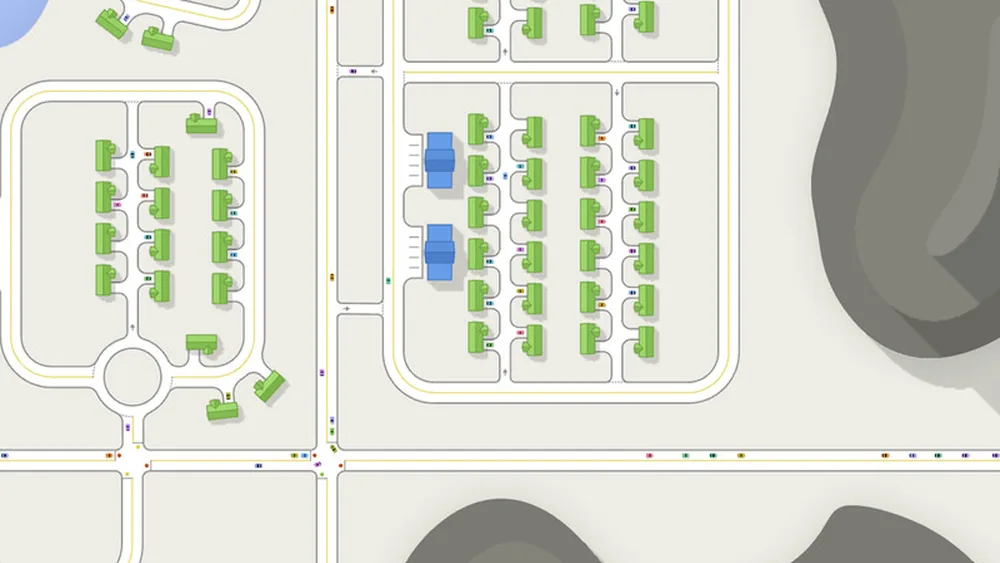
Most new players start by outlining districts with roads, then connect them. That order guarantees that every trip has to cross a boundary road. Do it the other way around.
- Draw one spine road across the map, roughly where your districts will meet. This is your main street, and it should never have buildings directly on it.
- Branch secondary roads off the spine at wide angles, then let local streets fill the space between them.
- Keep every local street able to reach the spine in two different ways. A cul-de-sac that feeds a single junction turns one blocked car into a blocked neighbourhood.
The road tool in Trafficity does not use a fixed grid. You can draw a road grid at any angle in about three clicks, and you can add individual lanes to an existing road afterwards. That freedom is the point of the game, but it also means a sloppy first road is expensive to fix later - the road tool guide→ explains the lane tools in detail.
Your first junction should be a roundabout
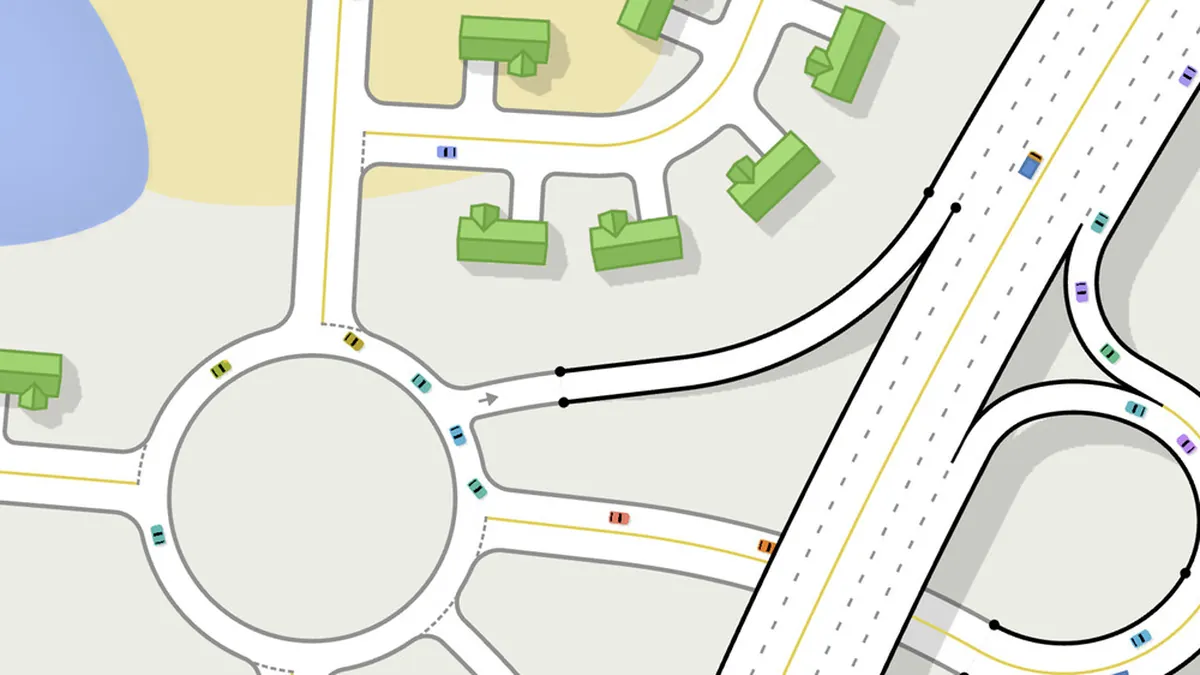
A bare crossing works while traffic is light. The moment two cars arrive at the same time from different directions, one of them waits, and if the waiting car is turning left across the flow, the queue behind it grows. A small roundabout avoids that by making every movement a right turn into the circulating lane.
Place one roundabout where your spine road meets the first secondary road, and keep the entrances to a single lane each until the traffic overlay shows real pressure. A four-entry roundabout handles a surprisingly large amount of traffic, and it fails gracefully: when it is overloaded you see cars queuing on the approach, not a deadlock in the middle.
You can see the difference between junction types on paper in intersection basics→. The short version: roundabout for three or four entries with mixed turning, signals for heavy straight-through flow, nothing at all for a low-traffic side street.
Connect the economy before you decorate
Every building in Trafficity has a reason to move. Residents need shops and workplaces. Factories need workers and raw materials. Shops need customers. If any of those connections is missing, the building stays unhappy no matter how pretty the street looks, and unhappy buildings do not grow your city level.
City level is the gate for new building batches, so the early game is really about keeping the existing buildings served. Before you place a new residential block, check that its residents can reach a shop and a job without crossing the industrial zone. Industrial traffic and residential traffic should share as little road as possible, and neither should run through the other.
- Put industry on the map edge, downwind and downstream of housing where the map allows it.
- Put shops on the road between housing and industry, so residents pass them on the way to work.
- Keep a second connection between the residential area and the industrial area. One road becomes a wall the first time it backs up.
Residents dislike road noise as well as industrial pollution. A wide, fast road running past a housing block is not free just because it is clean. If a neighbourhood refuses to grow, look at what it is next to before you add more housing.
Measure before you expand
The traffic overlay is the only honest feedback the game gives you. Open it after every few buildings and look for stretches that stay red through a full cycle, not just for a second as a batch of cars passes. Red on a single approach usually means a junction problem. Red along a whole road usually means the road is carrying traffic that belongs somewhere else.
This is the habit that separates a city that keeps working from one that needs a rebuild at level 20: fix the red segment while it is one junction long. The bottleneck diagnosis guide→ turns that into a five-step routine.
Three beginner mistakes worth avoiding
Building a grid because it looks tidy. A strict grid concentrates every trip onto the same few intersections. Organic curves spread the load, and the road tool makes them easy. The trade-off is covered in grid versus organic layouts→.
Zoning the whole map at once. Large batches of buildings create large batches of trips. Grow one district at a time so you can see which junction the new traffic actually uses.
Ignoring lane connections at the first sign of trouble. Adding a traffic light to a junction that has no lane discipline just moves the queue. Connect the lanes first, then decide whether a signal is needed.
Where the data comes from
- Trafficity on Steam ↗ - store description, price and feature list.
- Trafficity news hub ↗ - patch notes and developer posts.
- Steam global achievement percentages ↗ - the public endpoint behind the completion figures quoted here.
Official source: Trafficity on Steam ↗
FAQ
How long is the beginner phase? Until your first city reaches the point where the traffic overlay shows a persistent red segment that survives one rebuild. For most players that is somewhere around the first ten city levels, which is also where the first achievement sits.
Should I play Chill first? Chill is useful for learning the road tools without budget pressure, but it hides the cost of bad geometry. Play the first hour on Normal; switch to Chill only if you want to test a layout idea without committing a save.
Do I need traffic lights in the first city? Usually not. A roundabout and a sensible road hierarchy will carry a small city. Signals become necessary when a junction has heavy straight-through traffic from two directions, which is a mid-game problem.
What if my city stops growing? Check service first, not roads. A residential block that cannot reach a shop or a workplace will not level up, and no amount of road widening fixes that.